
You’ve raised funds. You’ve built the team. Now comes the part that can make or break your project’s reputation: how you distribute those tokens. If you dump them all at once, prices crash, investors panic, and trust evaporates. That’s where smart contract vesting comes in. It’s not just a technical feature; it’s a promise to your community that you’re in this for the long haul.
Vesting is the process of locking up tokens and releasing them gradually over time. In the past, this was handled by lawyers and manual bank transfers. Today, it’s code. Self-executing, transparent, and immutable. But getting it right requires more than just copying a script from GitHub. You need to understand the architecture, the risks, and the specific needs of your stakeholders.
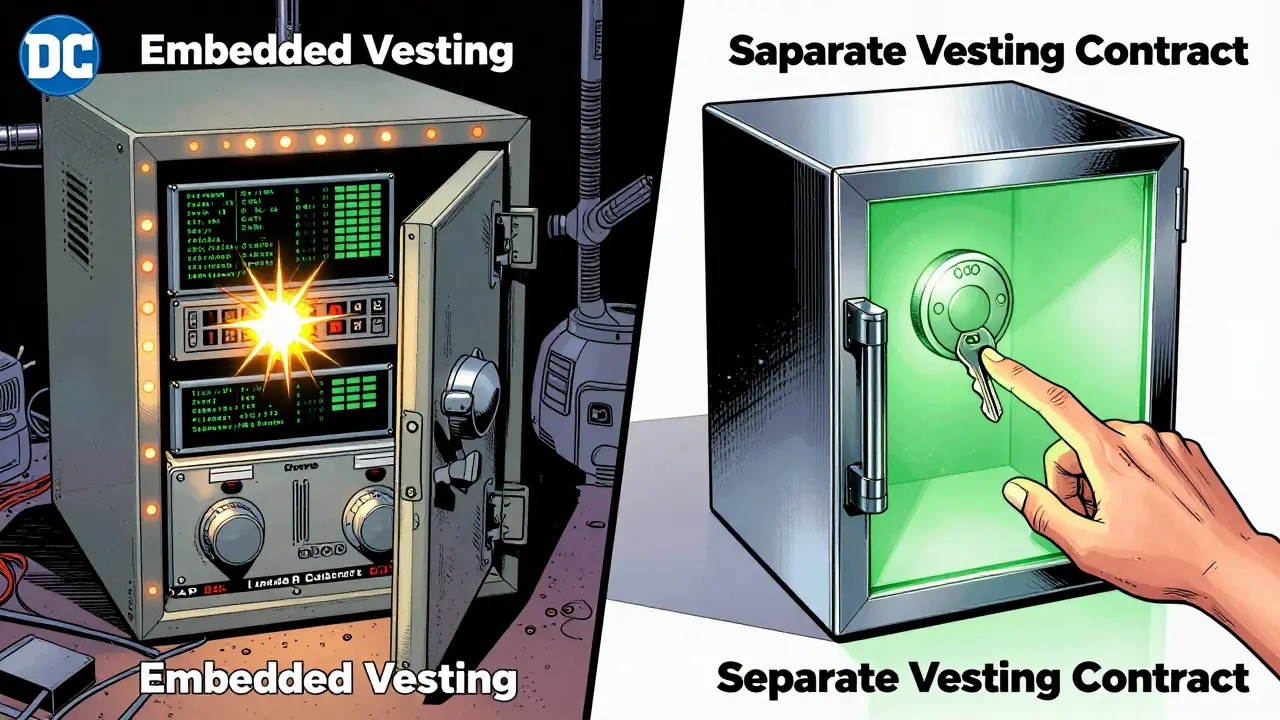
The Two Main Ways to Build Vesting Contracts
When implementing vesting, you generally have two architectural paths. The choice depends on how complex your tokenomics are and how much control you want.
Embedded Vesting is a method where vesting logic is written directly into the main token contract. This is the simpler approach. The token itself knows who owns what and when they can withdraw. It’s clean, but it bloats your core token code with administrative logic. If you need to change the vesting schedule later, you might have to upgrade the entire token contract, which is risky and expensive.
The second approach is a Separate Vesting Contract is an independent smart contract that holds tokens and releases them according to its own rules. Think of it like a safe deposit box. The token sits in the box (the vesting contract), and the contract decides when to hand out the keys. This is the industry standard for serious projects. It keeps your main token contract lightweight and allows you to use standardized, audited vesting libraries. Projects like TON (The Open Network) use sophisticated variations of this, creating separate "share" tokens that represent vested rights before being swapped for the actual utility token.
Defining the Rules: Key Parameters You Can’t Ignore
A vesting contract is only as good as its parameters. These aren’t just numbers; they are the legal terms of your agreement, written in code. Once deployed, most of these cannot be changed. So, get them right.
- Total Amount: How many tokens are locked? Be precise. On networks like TON, this is often calculated in nanotons (the smallest unit) to avoid rounding errors.
- Start Time: When does the clock start ticking? Is it upon deployment, or after a specific event like an ICO closing?
- Cliff Period: This is the initial lock-up period where no tokens are released. For team members, a 12-month cliff is common. It ensures someone doesn’t join, quit after three months, and still walk away with half their allocation.
- Unlock Period: How often do tokens drip out? Monthly? Weekly? Daily? Shorter periods mean smoother price impact but higher gas costs due to more transactions.
- Duration: The total length of the vesting schedule. Team vesting usually spans 3-4 years. Advisors might have 1-2 years. Investors vary based on their round.
Mathematical precision matters here. Your total duration must be divisible by your unlock period. If you try to set a 13-month vesting with monthly unlocks, the math breaks, and the contract might reject the deployment or behave unpredictably.
Push vs. Pull: Who Pays the Gas?
This is one of the biggest practical decisions in implementation. How do tokens get from the vesting contract to the beneficiary’s wallet?
In a Push model, the contract sends tokens to users automatically. This sounds nice, but it has a major flaw: who pays the gas fees? If the contract pays, you need to keep native currency (like ETH or TON) in the vesting contract, adding complexity and security risk. If the user pays, they can’t receive tokens if they don’t have funds, leading to frustrated teams who can’t access their own equity.
In a Pull model, the tokens stay in the contract until the user calls a function to claim them. The user pays the gas fee to withdraw. This is safer and cheaper for the project. However, it requires users to actively remember to claim their tokens. Most modern implementations use a Pull model because it shifts the cost burden to the recipient and reduces the attack surface of the contract holding multiple asset types.
| Feature | Push Model | Pull Model |
|---|---|---|
| User Experience | Automatic, hands-off | Manual claiming required |
| Gas Costs | Borne by contract/project | Borne by beneficiary |
| Security Risk | Higher (contract holds native gas) | Lower (tokens stay locked until claimed) |
| Best For | Small teams, high-value individual payouts | Large distributions, community rewards |
The Hidden Cost: Security Audits
Here’s the hard truth: custom smart contract development is expensive, not because of the coding hours, but because of the security audits. A vesting contract holds millions of dollars in value. It is a target. Hackers don’t care about your startup dreams; they care about the exploit.
You cannot skip the audit. Professional firms like ConsenSys Diligence, Trail of Bits, or OpenZeppelin charge between $15,000 and $50,000 depending on complexity. Why so much? Because they are testing for reentrancy attacks, integer overflows, and access control failures. A single bug can drain the entire vault.
If you’re building a custom solution, budget for at least two rounds of auditing. One for the initial code, and another if you make significant changes. Using open-source, battle-tested libraries (like OpenZeppelin’s vesting modules) can reduce this cost significantly, as the base logic has already been reviewed by thousands of developers.
Modern Trends: Layer 2s and DAO Governance
In 2026, deploying vesting contracts on Ethereum mainnet is becoming less common due to high gas fees. Instead, projects are moving to Layer 2 solutions like Polygon, Arbitrum, or Optimism. These networks offer near-instant finality and fractions of a cent in transaction costs, making frequent, small vesting unlocks economically viable.
Another shift is the integration of DAO Governance is community-driven decision-making processes that can influence vesting parameters within predefined limits. Traditionally, vesting schedules were rigid. Now, some projects allow the community to vote on extending cliffs or adjusting release rates if certain milestones are missed. This adds flexibility but introduces new governance risks. You must code strict bounds so a malicious majority can’t freeze the team’s tokens entirely.

Common Pitfalls to Avoid
I’ve seen too many projects stumble on basic implementation errors. Here’s what to watch out for:
- Ignoring Time Zones: Smart contracts run on Unix timestamps. Ensure your start times are calculated correctly across global teams. A mismatch can lead to premature unlocks or delayed payments.
- Hardcoding Addresses: Never hardcode beneficiary addresses in the contract code if possible. Use a configuration map that can be updated (with proper access controls) during the setup phase before locking.
- Forgetting Emergency Pauses: Include a circuit breaker. If a critical vulnerability is found, there should be a multi-signature mechanism to pause withdrawals temporarily. Without this, you’re helpless against exploits.
- Overcomplicating Logic: Simple is secure. If you can achieve your goal with linear vesting, don’t build a complex milestone-based system unless absolutely necessary. Every line of code is a potential bug.
Next Steps for Implementation
Before you write a single line of Solidity or FunC, define your stakeholder groups clearly. Map out each group’s cliff, duration, and unlock frequency. Then, choose your stack. For Ethereum-compatible chains, look at OpenZeppelin’s `VestingWallet` or `CliffVesting`. For TON, utilize their official vesting library which handles nanoton precision natively.
Finally, test on a testnet. Simulate every scenario: early withdrawal attempts, late claims, and edge cases around the cliff date. Only when the testnet results match your expectations exactly should you consider mainnet deployment. Remember, in blockchain, code is law, and the court of public opinion is unforgiving.
What is the difference between a cliff and a vesting period?
A cliff is an initial waiting period where no tokens are released. For example, with a 1-year cliff and 3-year vesting, you get nothing for the first 12 months. After the cliff, tokens begin to unlock gradually over the remaining 24 months. The vesting period is the total duration from start to finish.
Can I modify a vesting contract after deployment?
Generally, no. Core parameters like total amount and duration are immutable to ensure trust. However, you can design the contract with an admin role that allows limited changes, such as updating beneficiary addresses or pausing the contract, provided these controls are secured by multi-signature wallets.
Why is a Pull model preferred over a Push model?
Pull models are safer and more cost-effective for the project. They prevent the vesting contract from needing to hold native currency for gas fees, reducing security risks. Users pay the gas to claim their tokens, which simplifies the contract’s logic and reduces the attack surface.
How much does a smart contract audit cost?
Professional audits typically range from $15,000 to $50,000. The cost depends on the complexity of the code, the scope of the audit, and the reputation of the firm. Skipping this step is risky, as vulnerabilities in vesting contracts can lead to total loss of locked funds.
Which blockchain is best for vesting contracts in 2026?
Layer 2 solutions like Polygon, Arbitrum, and Optimism are popular due to low gas fees and fast execution. TON is also a strong choice for projects needing high throughput and mobile integration. Ethereum mainnet is less common for vesting due to high transaction costs, unless the value locked is extremely high.